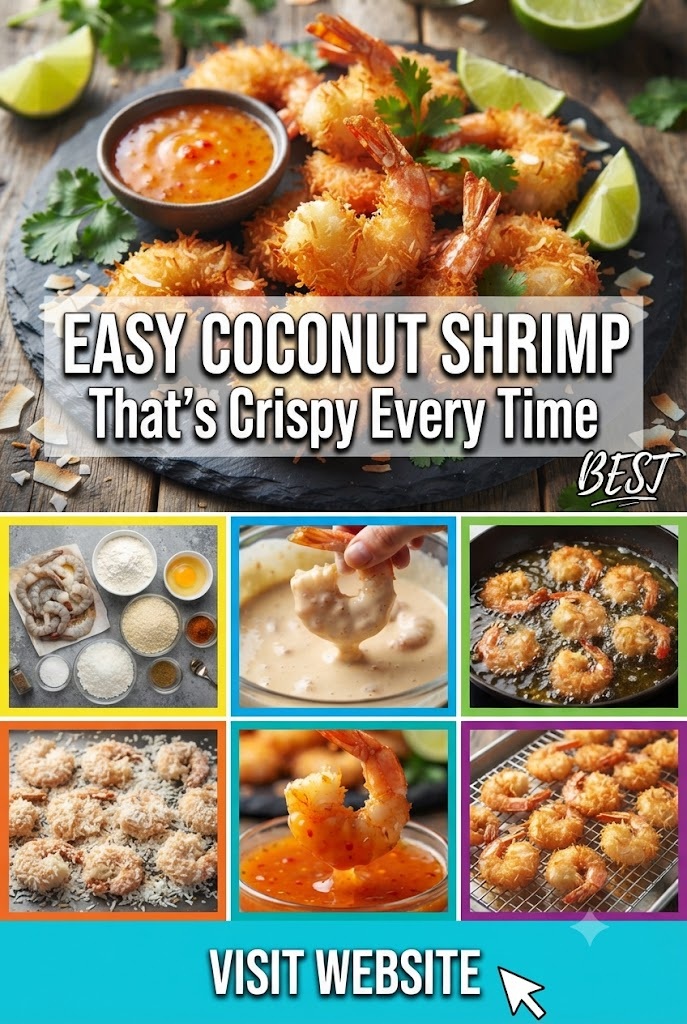
Close your eyes and imagine the sound of the perfect bite. It’s a distinct, audible crunch that gives way to a succulent, tender center. That is the hallmark of world-class coconut shrimp. For many of us, this dish is the quintessential vacation appetizer—the kind of thing you order at a breezy seaside shack or a high-end steakhouse to kick off a celebratory meal. But why wait for a vacation or a hefty restaurant bill to enjoy it?
Bringing that tropical flair into your own kitchen is surprisingly simple, provided you know a few technical secrets. We aren’t just tossing some shrimp in flakes and hoping for the best. We are building layers of texture and flavor that ensure every single prawn is a golden-brown masterpiece. Whether you are hosting a summer backyard bash, looking for a standout game-day snack, or just want to treat your family to a “fancy” Friday night dinner, this guide will walk you through the nuances of achieving that elusive, long-lasting crispiness.
Why This Method Works Every Single Time
The biggest complaint home cooks have with coconut shrimp is that the coating either falls off in the pan or turns into a soggy mess within minutes of hitting the plate. To solve this, we employ a “Triple-Threat” breading station. By using a combination of all-purpose flour, a seasoned egg wash, and a blend of Panko breadcrumbs with sweetened coconut flakes, we create a structural bond that stays put.Coconut Shrimp Crispy Every Time (Restaurant-Style Recipe)
Why You’ll Love This Recipe
This crispy coconut shrimp recipe delivers golden, crunchy shrimp with a juicy, tender inside. The secret is a double coating using panko breadcrumbs and shredded coconut, plus frying at the correct oil temperature.
Ingredients (Serves 4)
For the Shrimp
- 1 lb (450g) large shrimp (peeled and deveined, tails on)
- ½ teaspoon salt
- ½ teaspoon black pepper
- ½ teaspoon garlic powder
- ½ teaspoon paprika
Breading Station
- ½ cup all-purpose flour
- 2 large eggs
- 1 tablespoon milk
- 1 cup sweetened shredded coconut
- 1 cup panko breadcrumbs
- ½ teaspoon salt
- ¼ teaspoon black pepper
For Frying
- Vegetable oil or canola oil (about 3 cups)
Sweet Chili Dipping Sauce
Ingredients
- ½ cup sweet chili sauce
- 1 tablespoon mayonnaise
- 1 teaspoon lime juice
- ½ teaspoon sriracha (optional)
Mix everything together until smooth.
Step-by-Step Instructions
Step 1: Prepare the Shrimp
- Wash and pat the shrimp completely dry using paper towels.
- Season with:
- Salt
- Pepper
- Garlic powder
- Paprika
- Let sit for 10 minutes.
Step 2: Set Up the Breading Station
Bowl 1
- Flour
Bowl 2
- Eggs
- Milk
Whisk together.
Bowl 3
Mix together:
- Panko breadcrumbs
- Shredded coconut
- Salt
- Pepper
Step 3: Bread the Shrimp
- Coat shrimp in flour.
- Dip into egg mixture.
- Press into coconut-panko mixture until fully coated.
- Place on a tray.
For extra crunch:
- Dip again into egg.
- Coat again with coconut mixture.
Step 4: Heat the Oil
- Heat oil to 350°F (175°C).
- Use enough oil to cover half of the shrimp.
Do not overheat the oil, or the coconut may burn before the shrimp cook through.
Step 5: Fry the Shrimp
- Fry 5–6 shrimp at a time.
- Cook for 2–3 minutes per side.
- Turn once until both sides are golden brown.
- Remove and place on a wire rack or paper towels.
Air Fryer Method
- Preheat air fryer to 390°F (200°C).
- Spray shrimp lightly with cooking oil.
- Cook for 8–10 minutes.
- Flip halfway through cooking.
- Spray again if needed for extra crispiness.
Oven Method
- Preheat oven to 425°F (220°C).
- Place shrimp on a wire rack over a baking sheet.
- Spray with cooking oil.
- Bake for 12–15 minutes, turning halfway through.
Chef’s Tips for Crispy Shrimp
- Pat shrimp completely dry before breading.
- Use panko breadcrumbs for maximum crunch.
- Mix panko with shredded coconut for the best texture.
- Double-coat the shrimp for an extra crispy crust.
- Keep the oil at 350°F (175°C) throughout frying.
- Avoid overcrowding the pan, as it lowers the oil temperature.
- Drain fried shrimp on a wire rack to keep them crispy.
Serving Suggestions
Serve coconut shrimp with:
- Sweet chili sauce
- Mango salsa
- Pineapple salsa
- Garlic aioli
- French fries
- Coleslaw
- Fresh salad
- Steamed rice
Storage
- Refrigerator: Store in an airtight container for up to 3 days.
- Freezer: Freeze for up to 2 months.
Reheating
Air Fryer
- 375°F (190°C) for 3–4 minutes
Oven
- 400°F (200°C) for 8–10 minutes
Avoid microwaving, as it softens the crispy coating.
Nutrition (Approximate Per Serving)
- Calories: 420
- Protein: 28g
- Carbohydrates: 22g
- Fat: 24g
- Saturated Fat: 10g
- Fiber: 3g
- Sugar: 6g
- Sodium: 580mg
Frequently Asked Questions
Can I use frozen shrimp?
Yes. Thaw completely and pat dry before breading.
Can I make them ahead of time?
Yes. Bread the shrimp and refrigerate for up to 8 hours before frying.
Why did my coating fall off?
Make sure the shrimp are dry before coating, press the coating firmly onto the shrimp, and let the breaded shrimp rest for 10 minutes before frying.
What oil is best for frying?
Use a neutral oil with a high smoke point, such as vegetable, canola, peanut, or sunflower oil.
With these techniques, you’ll get coconut shrimp that are crispy, golden, and delicious every time.
Selecting Your Stars: The Shrimp Matter
Before you even reach for the coconut, you have to talk about the protein. Not all shrimp are created equal when it comes to frying.
Size is Everything
For coconut shrimp, you want “Jumbo” or “Extra Large” shrimp. Look for the numbers 16/20 or 21/25 on the bag. These numbers indicate how many shrimp make up a pound. If the shrimp are too small (like the 51/60 popcorn variety), they will overcook and become rubbery before the coconut coating has a chance to turn golden brown. Large shrimp provide enough surface area for the breading to cling to while remaining juicy inside.
Fresh vs. Frozen
In most parts of the United States, “fresh” shrimp at the seafood counter was actually frozen on the boat and thawed for display. Unless you live right on the coast and are buying from a dock, high-quality frozen shrimp (IQF – Individually Quick Frozen) are often superior. They are frozen at the peak of freshness. Just ensure you thaw them slowly in the refrigerator or under cold running water—never use warm water, as it ruins the texture.
The Prep: To Tail or Not to Tail?
For this specific recipe, leave the tails on. The tail acts as a natural handle for dipping the shrimp into the batter and, later, for the person eating them. It also adds a beautiful visual element that makes the dish look professional.
The Pantry Staples: Your Ingredient Breakdown
To get that signature flavor profile, you need a balance of sweet, salty, and savory.
- Shrimp: 1 pound of 16/20 count, peeled and deveined (tails on).
- The Flour Base: All-purpose flour mixed with a pinch of garlic powder, onion powder, and cayenne pepper. This “dry” layer is what grips the shrimp.
- The Binding Agent: Large eggs beaten with a splash of water or coconut milk. This acts as the glue.
- The Crunch Layer: This is a 50/50 split of Panko breadcrumbs and shredded coconut.
- Coconut Choice: Use sweetened shredded coconut for that classic restaurant taste. If you prefer a more savory, subtle vibe, go with unsweetened desiccated coconut, but the sweetened version provides that beautiful caramelization we all love.
- Frying Oil: Use an oil with a high smoke point. Vegetable, canola, or grapeseed oil are ideal. Avoid olive oil or butter, as they will burn long before the shrimp are done.
The Strategic Breading Station
Organization is the key to preventing “club hand”—that thick layer of dough that builds up on your fingers during breading. Set up three shallow bowls in a row:
- Bowl One (The Primer): Flour and spices.
- Bowl Two (The Glue): Beaten eggs.
- Bowl Three (The Finish): The Panko and coconut mixture.
Pro Tip: Use your left hand for “dry” steps and your right hand for “wet” steps. Use your left hand to toss the shrimp in flour. Use your right hand to move it through the egg wash. Use your left hand again to press it into the coconut mixture. This keeps your station clean and your coating even.
Step-by-Step Instructions for the Perfect Fry
1. The Butterfly Technique
To maximize the surface area for the coconut, “butterfly” your shrimp. After peeling and deveining, use a sharp paring knife to cut a deeper slit along the back of the shrimp, about halfway through the meat. Press it open slightly so it lays flatter. This allows the shrimp to cook faster and hold more of that delicious crunchy coating.
2. Drying and Dusting
Pat your shrimp extremely dry with paper towels. Any surface moisture will cause the flour to clump. Toss the dried shrimp in the seasoned flour, shaking off every bit of excess. You want a fine dust, not a heavy paste.
3. The Dip and Press
Dip the floured shrimp into the egg wash, ensuring it’s fully submerged. Let the excess drip off. Then, lay the shrimp into the coconut-Panko mix. Don’t just toss it; press the mixture onto the shrimp firmly. This physical pressure ensures the coconut won’t fall off during the frying process.
4. The Chill Factor (Optional but Recommended)
If you have time, place the breaded shrimp on a wire rack over a baking sheet and pop them in the fridge for 15–20 minutes. This helps the “glue” set and prevents the breading from shedding when it hits the hot oil.
5. Frying to Perfection
Heat about 1 inch of oil in a heavy-bottomed skillet or Dutch oven to 350°F. If you don’t have a thermometer, drop a pinch of breadcrumbs in; if they sizzle immediately, you’re ready.
Fry the shrimp in batches. Overcrowding the pan will drop the oil temperature, leading to greasy, soggy shrimp. Fry for about 2–3 minutes per side until they are a deep golden brown.
Alternative Cooking Methods: Air Fryer and Oven
While deep-frying is the gold standard for texture, you can achieve great results with modern alternatives.
The Air Fryer Method
Preheat your air fryer to 375°F. Lightly spray the basket with a non-stick cooking spray (preferably a coconut oil spray). Arrange the shrimp in a single layer, ensuring they aren’t touching. Spray the tops of the shrimp generously with oil—this is the secret to getting them brown in an air fryer. Cook for 8–10 minutes, flipping halfway through, until crispy.
The Oven-Baked Method
Preheat your oven to 425°F. Place a wire cooling rack on top of a large baking sheet. This allows hot air to circulate under the shrimp, preventing a soggy bottom. Lightly coat the shrimp with cooking spray and bake for 12–15 minutes. Note that baked coconut shrimp will be lighter in color but still very crunchy.
Troubleshooting: Common Mistakes to Avoid
Even seasoned cooks can run into trouble with this dish. Here is how to avoid the most common pitfalls:
- The Coconut is Burning: This usually happens because the oil is too hot or you are using coconut flakes that are too large. If the coconut is turning black before the shrimp is cooked, turn down the heat and try to use a “finely shredded” coconut variety.
- The Coating is Falling Off: This is almost always caused by not drying the shrimp enough before the flour stage, or skipping the “press” step in the coconut bowl. Make sure that flour layer is thin and the coconut is firmly pressed into the egg wash.
- Rubbery Shrimp: You’ve overcooked them. Shrimp only need a few minutes. As soon as the meat turns opaque and the tail curls slightly, they are done.
- Greasy Results: This happens when the oil isn’t hot enough. When the oil is at 350°F, it creates steam that pushes the oil away from the food. If the oil is too cool, it soaks into the breading instead.
The Essential Dipping Sauce: Sweet Chili Lime
You cannot serve coconut shrimp without a proper dipping sauce. While a simple jar of Thai Sweet Chili sauce works in a pinch, a quick “doctoring up” makes it incredible.
The Recipe:
- 1/2 cup Thai Sweet Chili Sauce
- 1 tablespoon lime juice (freshly squeezed)
- 1 teaspoon grated fresh ginger
- 1 teaspoon soy sauce
- Optional: A pinch of red pepper flakes for extra heat.
Whisk these together in a small bowl. The acidity of the lime and the zing of the ginger cut through the richness of the fried coconut, creating a perfectly balanced palate.
Modern Flavor Variations
Once you master the classic version, feel free to get creative with your breading:
- Spicy Tropical: Add a teaspoon of Caribbean jerk seasoning to the flour mixture.
- Citrus Zest: Fold some fresh lime or orange zest into the coconut-Panko mixture for a bright, aromatic lift.
- Nutty Crunch: Replace 1/4 of the Panko with finely crushed macadamia nuts for a truly Hawaiian experience.
- Piña Colada Style: Use coconut milk instead of water in your egg wash and serve with a pineapple-habanero marmalade.
Best Side Dishes for a Complete Meal
Coconut shrimp is quite rich, so you want to pair it with sides that provide contrast—think bright, acidic, and fresh.
- Cilantro Lime Rice: The zestiness of the rice balances the sweetness of the coconut.
- Tropical Slaw: A vinegar-based coleslaw with shredded mango, cabbage, and red onion.
- Grilled Pineapple: The charred sugars of the fruit complement the fried shrimp perfectly.
- Cucumber Salad: Thinly sliced cucumbers in a rice vinegar and sesame oil dressing provide a cooling effect.
Storage and Reheating Tips
Coconut shrimp are best enjoyed immediately. However, if you have leftovers, don’t lose hope.
- Storage: Keep them in an airtight container in the fridge for up to 2 days.
- The Golden Rule of Reheating: Never, ever use the microwave. It will turn the shrimp into rubber and the coating into mush.
- The Best Way to Reheat: Use a toaster oven or air fryer at 350°F for 3–5 minutes. This will re-crisp the coconut and Panko without overcooking the shrimp further.
Can You Freeze Coconut Shrimp?
Yes! In fact, this is a great “make-ahead” meal.
To Freeze: Bread the shrimp according to the instructions, but do not cook them. Place the breaded, raw shrimp on a baking sheet in a single layer and freeze for 2 hours until solid. Transfer them to a freezer-safe Ziploc bag. To Cook from Frozen: You can fry or air fry them directly from the freezer. Just add 2–3 minutes to the cooking time. This is much better than freezing them after they have been cooked.
The Science of the Crunch: Panko vs. Standard Breadcrumbs
You might wonder if you can just use regular breadcrumbs. You can, but you shouldn’t. Panko breadcrumbs are Japanese-style crumbs made from bread baked by electrical current, which yields a crumb without a crust. These crumbs are larger, airier, and more jagged than traditional crumbs. Because they have more surface area and don’t pack down tightly, they create little “pockets” that get extra crispy and don’t absorb as much oil. When mixed with coconut, they provide the structural integrity that coconut flakes lack on their own.
Sourcing Sustainable Seafood
When shopping for shrimp in the U.S., look for labels like “BAP Certified” (Best Aquaculture Practices) or “Marine Stewardship Council” (MSC) blue fish label. Sustainable shrimp farming and wild-catching practices ensure that we can enjoy this delicious seafood for generations to come without destroying mangrove forests or depleting ocean stocks. US-landed wild shrimp, such as Gulf Pink or Brown shrimp, are often considered some of the best in the world for flavor and firm texture.
Kitchen Equipment Essentials
To make this process as smooth as possible, ensure you have these tools on hand:
- A Wide Heavy Skillet: Cast iron or stainless steel is best for maintaining heat.
- Wire Cooling Rack: Essential for letting the shrimp drain without getting soggy.
- Instant-Read Thermometer: To ensure your oil stays at that magic 350°F.
- Spider Strainer or Slotted Spoon: For safely removing the shrimp from the hot oil.
- Paring Knife: For deveining and butterflying.
Scaling for a Crowd
If you are making this for a large party, the “butterfly” method is your best friend because it makes the shrimp look much larger than they are, allowing you to feed more people with fewer pounds of seafood. Plan on 4–5 jumbo shrimp per person for an appetizer, or 8–10 for a main course.
When cooking for a crowd, keep a baking sheet with a wire rack in a 200°F oven. As you finish batches of shrimp, place them in the oven. This keeps them warm and crispy while you finish the rest of the poundage.
Nutritional Overview
While coconut shrimp is an indulgent treat, shrimp themselves are a powerhouse of nutrition. They are low in calories and high in protein, providing essential nutrients like Iodine, Vitamin B12, and Selenium. The primary calories in this dish come from the coconut fats and the frying oil. By using the air fryer method mentioned above, you can significantly reduce the fat content while still enjoying the flavor profile.
Frequently Asked Questions
Can I use frozen pre-cooked shrimp? No. Pre-cooked shrimp will become extremely tough and rubbery if you bread and fry them again. Always start with raw shrimp for this recipe.
What is the best oil for frying coconut shrimp? Vegetable oil, canola oil, or peanut oil are the best choices due to their high smoke points and neutral flavors.
How do I keep the coconut from falling off in the pan? The three-step process is vital: Flour, then Egg, then Coconut. The most important part is pressing the coconut firmly into the shrimp with your palms before frying.
Is coconut shrimp gluten-free? The standard recipe is not, as it uses flour and Panko. However, you can easily make it gluten-free by using a 1-to-1 gluten-free flour blend and gluten-free Panko crumbs.
Why is my coconut not getting brown? If your shrimp are cooked but the coconut is still pale, your oil temperature was likely too low. The sweetened coconut needs a certain amount of heat to caramelize the sugars.
Should I wash the shrimp before breading? You should rinse them to remove any stray shell fragments, but you must pat them completely dry with paper towels afterward. If they are wet, the flour will slide right off.
Can I make this recipe with coconut flour? You can use coconut flour for the first “dusting” step to add extra coconut flavor, but do not use it for the final crunchy layer. Coconut flour is very absorbent and will not provide the necessary crunch; it will turn into a thick, dry paste.
What can I use instead of egg wash? If you have an egg allergy, you can use heavy cream or a thick coconut milk as the binding agent. It won’t hold quite as strongly as egg, but it will work.
How long does it take to fry shrimp? Shrimp cook very quickly. In 350°F oil, jumbo shrimp usually take about 2 minutes per side. Look for the meat to turn from translucent to an opaque white/pink.
What kind of coconut should I buy? For the most authentic “restaurant style” taste, look for “Sweetened Shredded Coconut” in the baking aisle. For a more natural, less sweet version, look for “Unsweetened Shredded” or “Desiccated” coconut in the health food aisle.
Conclusion
Mastering the art of crispy coconut shrimp is a true milestone for any home cook. It’s a dish that relies on a few fundamental culinary principles: moisture control, proper dredging technique, and temperature management. By following the “Triple-Threat” breading method and ensuring your oil is at the perfect sizzling point, you can create a meal that rivals any tropical resort’s signature dish.
There is something deeply satisfying about the contrast between the sweet, toasted coconut shell and the savory, salty shrimp inside. When paired with a zesty sweet chili sauce, it’s a flavor explosion that feels like a celebration in every bite. So, the next time you’re craving a taste of the islands, skip the takeout menu. Grab a bag of jumbo shrimp, some panko, and a bag of coconut, and turn your kitchen into the best seafood spot in town. Your friends and family will be begging for the recipe—and you’ll know the secret to that perfect crunch is all in the technique. Happy cooking!
