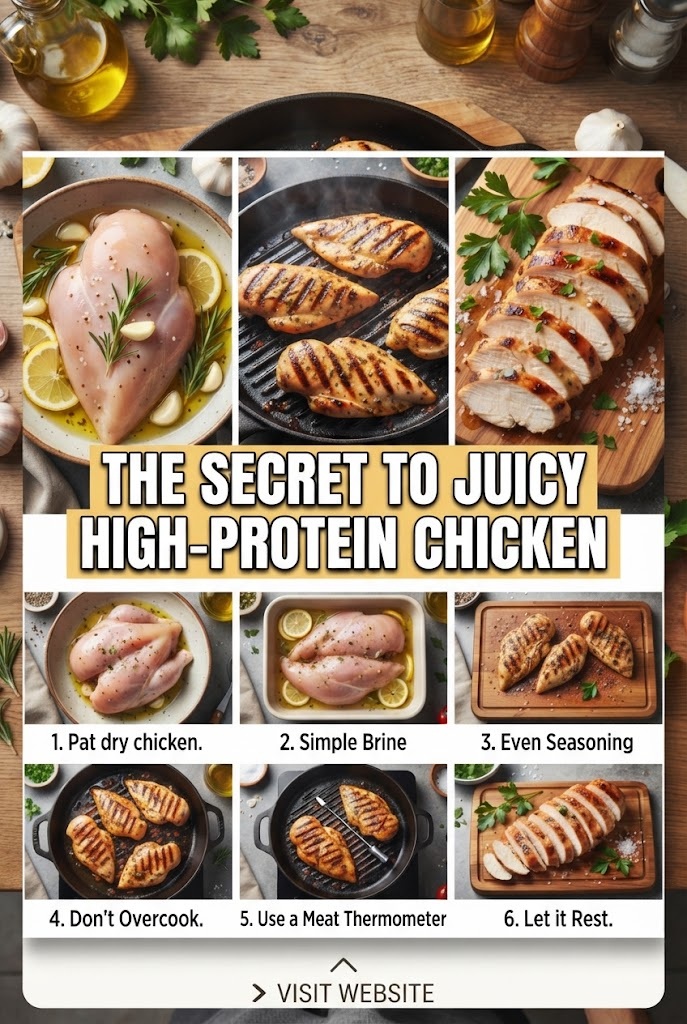
The Secret to Juicy High-Protein Chicken: The Ultimate Guide, Science, and Master Recipe
Introduction: The Great Chicken Dilemma
For anyone pursuing a fitness goal, building muscle, or simply trying to maintain a healthy lifestyle, chicken breast is the undisputed king of the refrigerator. It is affordable, remarkably versatile, and packed with lean protein—boasting roughly 31 grams of protein per 3.5-ounce (100g) serving with almost zero carbohydrates and very little fat.
Yet, it carries a universal reputation: it is notoriously easy to ruin.
If you have ever choked down a plate of dry, stringy, rubbery chicken breast that feels more like chewing a leather boot than eating a meal, you are not alone. The internet is flooded with complaints about “sad meal prep chicken.” But the problem isn’t the chicken itself; it’s the technique.
This comprehensive masterclass explores the exact culinary science behind moisture retention, the physiology of muscle fibers, and the ultimate methods to lock in juices. Complete with a step-by-step master recipe, ingredient breakdowns, and troubleshooting guides, this manual ensures you will never eat dry chicken again.
Part 1: The Culinary Science of Why Chicken Dries Out
To fix dry chicken, you first have to understand why it happens.
Chicken meat is composed of long, bundle-like muscle fibers held together by connective tissue (collagen) and filled with water and proteins. When you apply heat, these protein structures (primarily actin and myosin) undergo denaturation.
- The Tightening Phase: As the internal temperature climbs past 140°F (60°C), the muscle proteins begin to coagulate, shrinking and tightening.
- The Moisture Expulsion: Think of muscle fibers like tiny, water-filled sponges wrapped in rubber bands. As heat increases, those bands contract aggressively, squeezing the water right out of the meat.
- The Danger Zone: By the time a chicken breast hits 170°F (77°C) or higher—a common occurrence when people cook “just to be safe”—up to 30% of its moisture has been violently expelled. The result? A chalky, dry texture.
Understanding this means realizing that temperature control is your absolute best defense. Safe poultry cooking is achieved at an internal temperature of 165°F (74°C). Thanks to carryover cooking, pulling chicken slightly early and letting it rest allows it to reach safety while retaining maximum liquid content.
Part 2: The Four Pillars of Perpetually Juicy Chicken
Achieving restaurant-quality, exceptionally juicy high-protein chicken relies on four fundamental pillars. Master these, and your meal prep routine will completely transform.
1. Brining (The Magic of Osmosis)
Before heat even touches your chicken, brining is your first line of defense. A simple salt-water solution (or a dry brine using coarse sea salt) alters the protein structure of the meat. Salt dissolves some of the muscle proteins (myosin), creating a gel-like matrix that traps water molecules inside the cell walls. When cooked, this trapped water refuses to escape, acting as an internal reservoir of juiciness.
2. Mechanical Tenderization (Pounding)
Chicken breasts naturally taper from a thick lobe to a thin tail. If you cook them as-is, the thin end will overcook and dry out long before the thick center reaches 165°F. Using a meat mallet to gently pound the breast to an even thickness (about 3/4 inch) ensures uniform cooking times and disrupts tough muscle fibers, creating a tender bite.
3. Thermal Protection (Velveting, Coatings, and Marinades)
Adding a protective barrier or moisture-binding ingredient transforms the exterior.
- Acidic or Yogurt-based Marinades: Yogurt contains lactic acid and calcium, which gently tenderize proteins without turning them mushy (unlike harsh citrus or vinegar marinades left too long).
- The Asian “Velveting” Technique: Coating chicken strips in a thin layer of cornstarch and egg white before cooking locks in juices by creating a moisture-sealed barrier.
4. Controlled Rest Periods
Never slice a hot piece of chicken straight out of the pan or off the grill. As meat cooks, the internal juices are driven toward the center under pressure. If you cut it immediately, those juices pool out onto your cutting board. Allowing the chicken to rest for 5 to 8 minutes lets the muscle fibers relax and reabsorb that liquid, ensuring every bite stays moist.
Part 3: Master Recipe — The Ultimate High-Protein Juicy Garlic-Herb Chicken Breasts
This master recipe incorporates all four scientific pillars: a quick brine, uniform flattening, a protein-rich yogurt marinade, and precise temperature management.
- Prep time: 15 minutes (+ 30 minutes marinating)
- Cook time: 10 minutes
- Resting time: 5 minutes
- Total time: 30 minutes
- Servings: 4
- Protein per serving: ~38 grams
Ingredients Form
For the Chicken & Marinade:
- 4 large boneless, skinless chicken breasts (approx. 6–8 oz each)
- 1/2 cup plain Greek yogurt (0% or 2% fat—adds extra protein and acts as a tenderizing binder)
- 2 tablespoons extra virgin olive oil
- 3 cloves garlic, minced
- 1 tablespoon fresh lemon juice
- 1 teaspoon kosher salt
- 1/2 teaspoon black pepper
- 1 teaspoon smoked paprika
- 1 teaspoon dried oregano
- 1/2 teaspoon onion powder
For the Pan-Sear Finish:
- 1 tablespoon avocado oil or high-heat cooking oil
- 1 tablespoon unsalted butter (optional, for rich browning)
- 2 sprigs fresh rosemary or thyme
Step-by-Step Instructions
Step 1: Prep and Flatten
- Place your boneless, skinless chicken breasts on a clean cutting board.
- Cover them with a sheet of plastic wrap or parchment paper to prevent tearing.
- Using a meat mallet, rolling pin, or heavy skillet, gently pound the thickest parts of the chicken until the entire breast achieves a uniform thickness of roughly 3/4 inch. This prevents uneven cooking.
Step 2: The Moisture-Lock Marinade
- In a medium mixing bowl, whisk together the Greek yogurt, extra virgin olive oil, minced garlic, lemon juice, kosher salt, black pepper, smoked paprika, dried oregano, and onion powder until smooth.
- Add the chicken breasts to the bowl, using your hands or tongs to ensure every piece is thoroughly coated in the yogurt mixture.
- Cover the bowl and let it marinate at room temperature for 30 minutes (or cover and place in the refrigerator for up to 4 hours if prepping ahead). Note: The lactic acid in the Greek yogurt breaks down outer surface fibers, ensuring ultra-tender meat.
Step 3: Sear to Golden Perfection
- Remove the chicken from the marinade, letting any heavy excess drip off, but do not wipe it completely clean.
- Place a heavy-bottomed skillet (cast iron or stainless steel works best) over medium-high heat. Add the avocado oil and let it heat until shimmering and lightly smoking.
- Lay the chicken breasts in the pan away from you to prevent hot oil splatters. You should hear an immediate, vigorous sizzle.
- Let them sear undisturbed for 4 to 5 minutes to develop a rich, golden-brown crust. Do not move them around.
Step 4: Finish and Baste
- Flip the chicken breasts over.
- Drop the tablespoon of unsalted butter and the fresh rosemary or thyme sprigs into the pan.
- As the butter melts and foams, tilt the pan slightly and use a large spoon to continuously scoop the melted foaming butter over the top of the chicken breasts. This basting process accelerates cooking while infusing deep, aromatic flavor.
- Cook for an additional 3 to 4 minutes, or until a digital meat thermometer inserted into the thickest part of the meat registers 160°F (71°C).
Step 5: The Crucial Rest
- Transfer the cooked chicken breasts immediately to a warm cutting board or a clean plate.
- Tent loosely with a piece of aluminum foil.
- Let the chicken rest undisturbed for exactly 5 to 7 minutes. (During this time, residual carryover cooking will safely lift the internal temperature to the required 165°F, and the internal juices will redistribute evenly through the muscle cells).
- Slice against the grain into thick medallions and serve.
Part 4: Alternative High-Protein Cooking Methods
While the stovetop cast-iron method yields a phenomenal crust, you can apply the exact same juiciness principles to other cooking environments.
1. The Air Fryer Method
Air fryers use rapid convection heat, which can easily dry out lean meats if unmanaged.
- The Technique: Prepare the chicken using the Greek yogurt marinade or a light oil coating. Preheat your air fryer to 380°F (193°C). Place the chicken in a single layer without overcrowding.
- Cooking Time: Cook for 10 to 12 minutes, flipping halfway through. Check internal temperature precisely at the 10-minute mark. Rest for 5 minutes before slicing.
2. The Sheet Pan Oven Method
Ideal for meal-prepping large batches of chicken all at once without active monitoring.
- The Technique: Preheat your oven to a high temperature—around 425°F (220°C). High heat cooks the exterior quickly before internal moisture evaporates. Line a baking sheet with parchment paper, place your seasoned and oiled chicken breasts down, and surround them with high-protein vegetables like broccoli or cubed potatoes if desired.
- Cooking Time: Roast for 18 to 22 minutes (depending on thickness) until the internal temperature hits 160°F, then switch to broil for the final 2 minutes to get color. Rest before serving.
3. The Low-and-Slow Shredded Method (Crockpot / Pressure Cooker)
If you prefer shredded chicken for meal-prep burrito bowls, tacos, or salads, high-heat dry cooking will cause it to seize up.
- The Technique: Use chicken breasts or a mix of breasts and thighs. Submerge them in a flavorful liquid (such as low-sodium chicken bone broth blended with salsa, taco seasoning, or crushed tomatoes).
- Cooking Time: Cook on LOW in a slow cooker for 6 to 8 hours (or high pressure in an Instant Pot for 15 minutes with a natural release). Because it braises in liquid, it stays exceptionally moist and falls apart effortlessly.
Part 5: Nutritional Breakdown & Meal Prep Strategies
Nutritional Profile (Per Serving of Master Recipe)
- Calories: ~245 kcal
- Protein: 38.5 g
- Total Fat: 8.2 g
- Carbohydrates: 2.1 g
- Sodium: 580 mg (varies based on salt preference)
How to Store and Reheat Meal Prep Chicken
Dryness often creeps in during the reheating process. Follow these storage rules to keep your high-protein meals tasting fresh all week:
- Storage: Store cooked, sliced or whole chicken breasts in an airtight glass container lined with a small paper towel (to absorb excess condensation) in the refrigerator for up to 4 days.
- Freezing: You can freeze cooked chicken for up to 3 months. Slice it first and store it in freezer bags with a splash of chicken broth to protect the texture during thawing.
- The Golden Reheating Rule: Never microwave chicken on high power for 2 minutes—this shocks the muscle proteins, driving out all the moisture and leaving it rubbery. Instead, place chicken in a microwave-safe dish, splash 1 teaspoon of water or chicken broth over the top, cover tightly with a damp paper towel or microwave lid, and heat at 50% power in 30-second increments until warm.
Conclusion: Elevate Your High-Protein Routine
Eating clean to support your health and fitness goals should never feel like a punishment. By moving away from rushed, unseasoned cooking habits and embracing the science of brining, uniform tenderization, protective marinades, and strict temperature control, you elevate humble chicken breast into a culinary masterpiece.
Apply these principles to your weekly meal prep, keep your digital meat thermometer handy, and enjoy high-protein eating that is genuinely mouthwatering, tender, and juicy every single time.
What is your biggest struggle when cooking chicken for meal prep, and which of these techniques are you going to try first?
